Friday, February 5, 2010
My varnishing set-up
I completed a couple of eggs for my usual Friday Egg schedule, but I ended up having to varnish them instead of taking "boudoir photos" of the eggs. I can only put varnish on when the weather is clear and dry and it has been raining here for what seems like weeks! So here we are in my dark and dreary garage workroom, where I will show you how I put varnish on eggs.
I have really struggled with this step in the process. The problem is getting a smooth coat of varnish on a round surface. I tried using the drying board with nails that various Pysanky egg suppliers sell, but that never worked because the egg would stick to the nail tips and either a bit of varnish or a bit of the eggshell itself would break off! Not good. Spray varnish is another way to go, and it is okay, but I am not patient and end up with drips and dribbles because I spray far too heavy of a coat instead of lots of thin ones. Plus I found that it is much more expensive as well as wasteful.
Now I use varnish out of a can (Liquitex or Golden MSA) and apply it with a fan brush, which allows a bit thinner coating. To keep the eggshell supported without touching it, I use lengths of floral wire inside the original hole from blowing out the egg contents. I insert the wire into blocks of floral styrofoam or a block of styrofoam mailing popcorn.
Here I am using my drying board to support the egg while I varnish it.
I start with the egg vertical and brush varnish on the top and sides. Then I flip it over and get the bottom part of the egg. Finally, I brush from bottom to top on all sides until I feel that I have gotten good and even coverage.
As much as I can, I try to keep the coats light because I don't monitor for drips and hate getting a dried up bump at the bottom that I have to sand off or cut off with an X-acto blade. One good thing about using the floral wire is that extra varnish will often drip down and off the egg completely.
Here's the egg stuck into styrofoam and ready to dry out:
Oh, and one last thing: DON'T USE WATER-BASED VARNISH!!! I learned the hard way when the guy at the hardware store steered me wrong. Just make sure it is the one with health hazard warnings all over the can and you will be safe. You might not be healthy, but you will be safe in knowing you are using the right varnish.
If you have any tips or ideas that you think might make this process easier, I would love to hear them.
Wednesday, February 3, 2010
Gilded Egg
We arrived back home from Santa Fe yesterday, and I have some great ideas for new egg designs that surprisingly have not much to do with either Southwestern or Native American traditions.
We always try to get a visit in to Ten Thousand Waves after a day of skiing. I would like to go every day, but it gets a bit expensive. This time we enjoyed 85 minutes in the "Waterfall" tub, which is a marvelously large tub with a bench and jets on one side and a deep end that goes to at least 4 feet at the other end. There is a cold plunge with a waterfall to jump in when the hot tub gets to be too much, and a dry sauna for variety. I felt like a boiled noodle at the end - it was great fun!
The spa is inspired by Japanese baths, so everything is spare and considered and simple. The gift shop is full of candles and tea sets and gorgeous little ceramic bibelot. Among all that, I found a well-thumbed copy of a book called "Traditional Kimono Silks" by Anita Yasuda. The book is basically a photo album of kimono fabric scraps, so visually inspiring, though edited sloppily with mislabeled pictures throughout - very disappointing. However, it has furthered my thinking about trying to keep the rhythm of a design or pattern while managing to free it from a rigid grid or framework. More of this in the weeks to come...
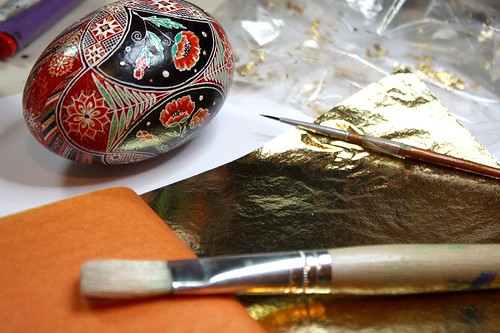
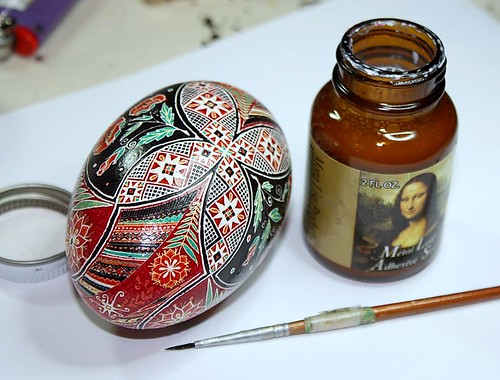
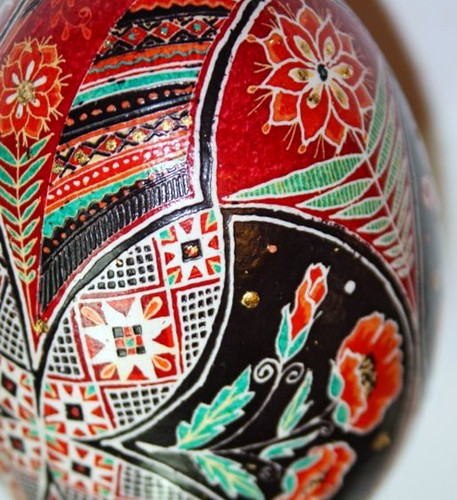
In addition, I started thinking about using a bit of gilding to pick out some highlights in the eggs. Today I dug out my glue and gold leaf to see what I could do to enhance a finished design. The picture above shows the finished product. I used Mona Lisa Products sizing and leaf, that I got ages ago at Hobby Lobby.
To start, I put tiny dots of the glue/sizing where I wanted the gold to be:
The difficult part of this is waiting for the glue to get tacky, which takes about an hour, without accidentally smearing it.
Once the glue is tacky rather than wet it's time to put the gold leaf on. It gets kind of messy, and I need to figure out a better way to keep the sheets smooth so that they go on smoothly. It looks "okay" when it is wrinkled, but much better and more professional when smooth.
I used a large paintbrush...
to smooth the gold leaf over the adhesive...
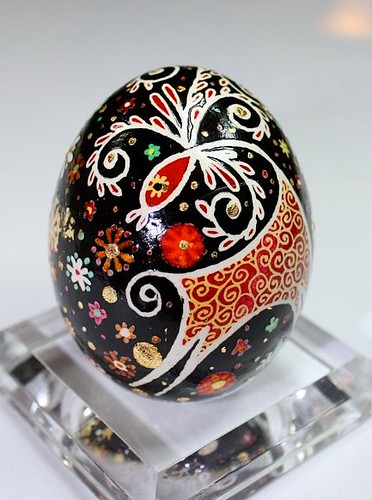
What do you think? I am of two minds about this. I love gold and glitter as much as the next person (probably more), but it does have a tendency to make something look cheaper somehow. Plus, I want to avoid looking like I am trying to make Faberge style eggs.
Here's another one that I glitzed up:
Subscribe to:
Posts (Atom)


